This week I will take you through the stages that the paintings went through for the restaurant project that was discussed last week.
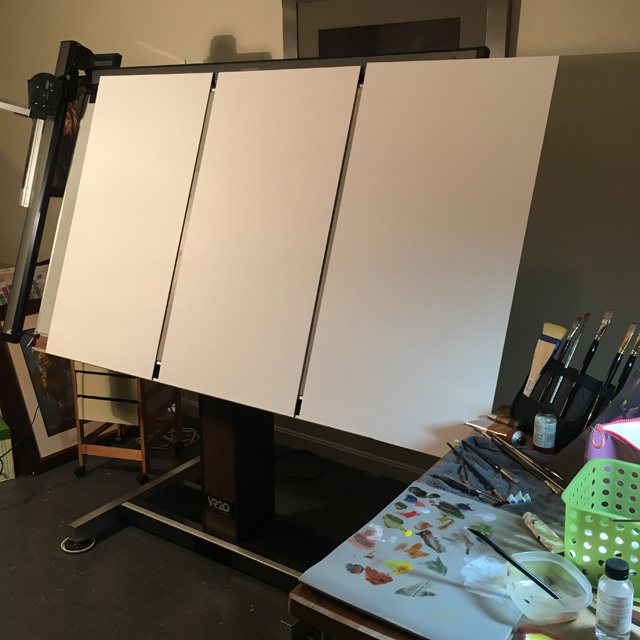
So since these panels were so big- 22″ x 42″ each, they had to go on my drafting table so I could work on them simultaneously. Constantly moving back and forth between them and bouncing the same colors around on each for unity. Since I was painting to the very edges, I couldn’t clamp or tape them down so I had to have them leaning back a bit as they rested on the lip at the bottom of the table. I also had to be very careful of the surface since it is paper. It is indestructible and treated for oil paint, but still I didn’t want dents or scratches on it. The last panel barely fit on and stuck out a bit to the right, but at least it stayed put. I absolutely love this table since it has automatic pedals at the bottom to move the table up and down which made it great to work on while standing.
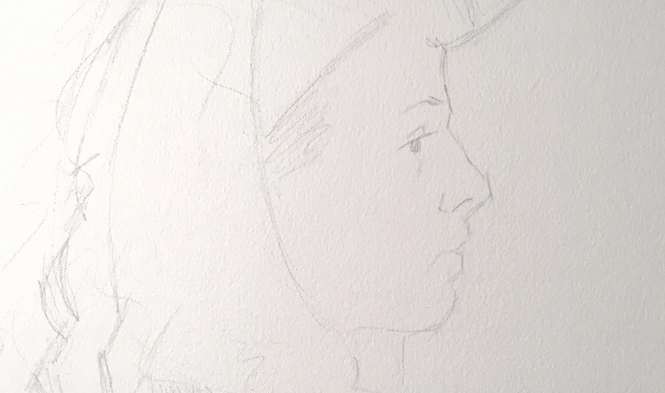
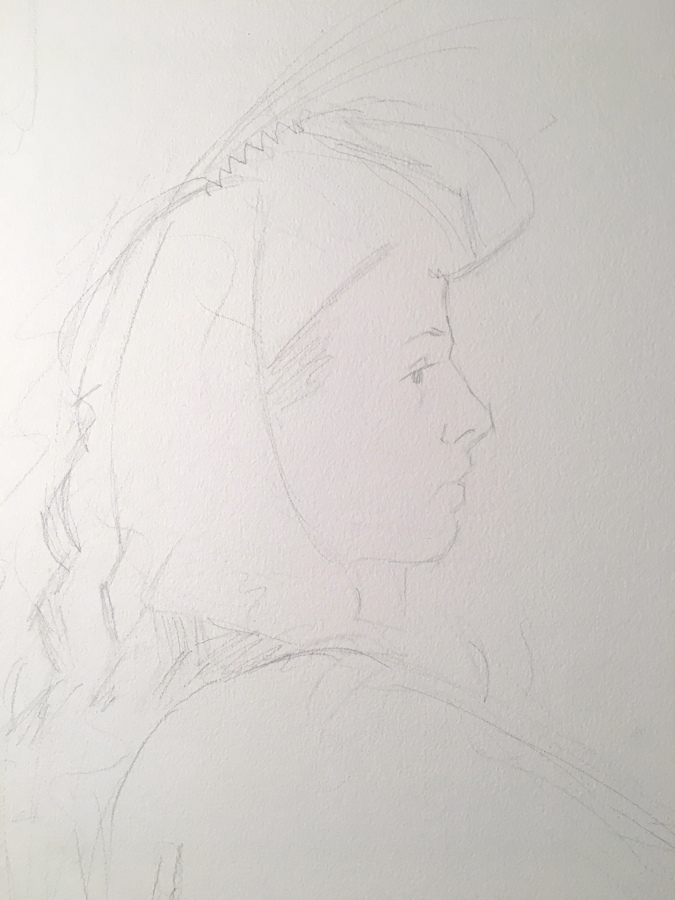
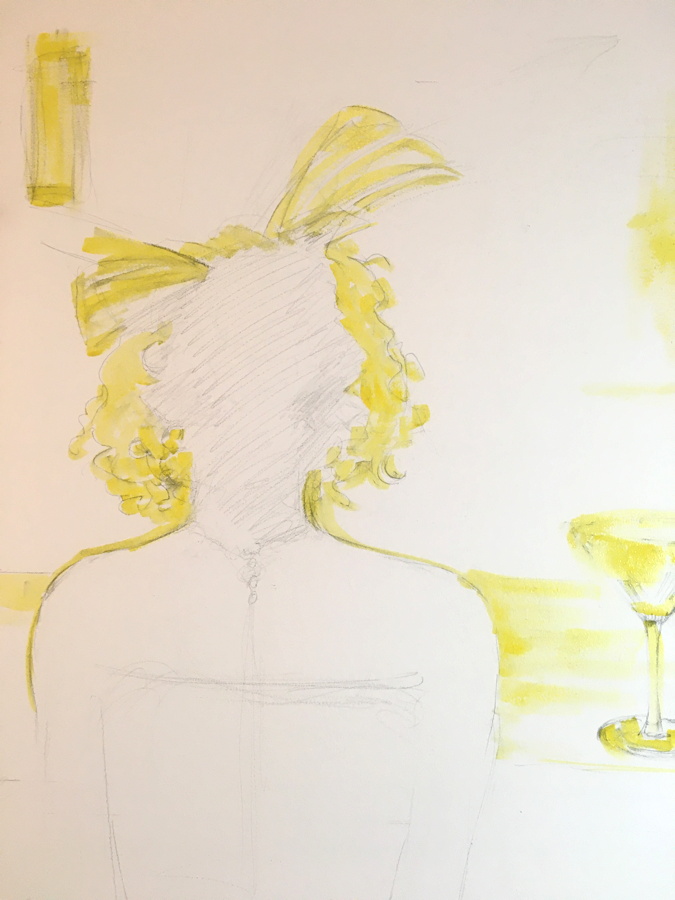
Once the designs were figured out I started drawing.
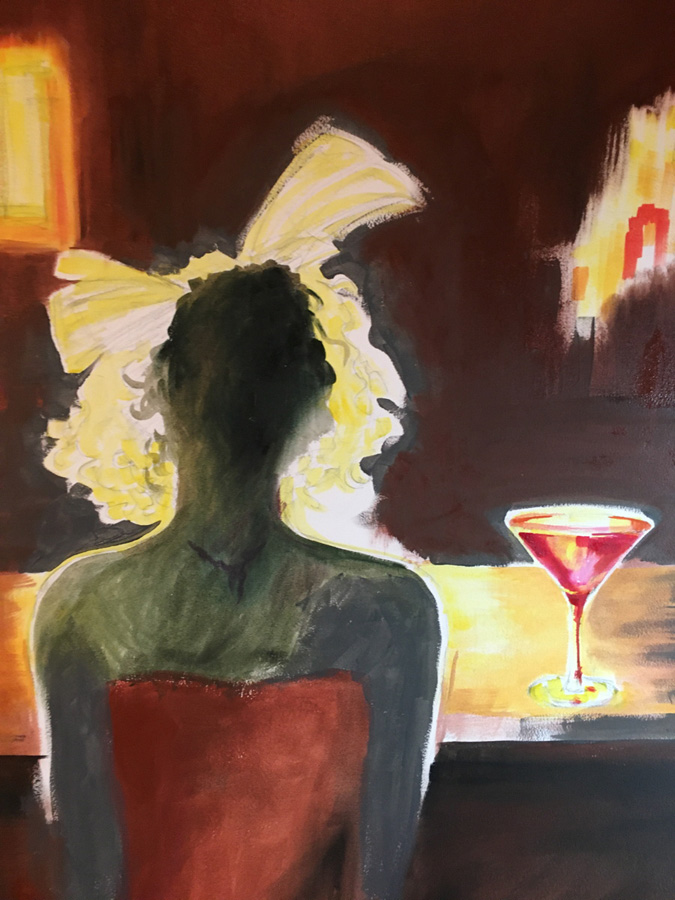
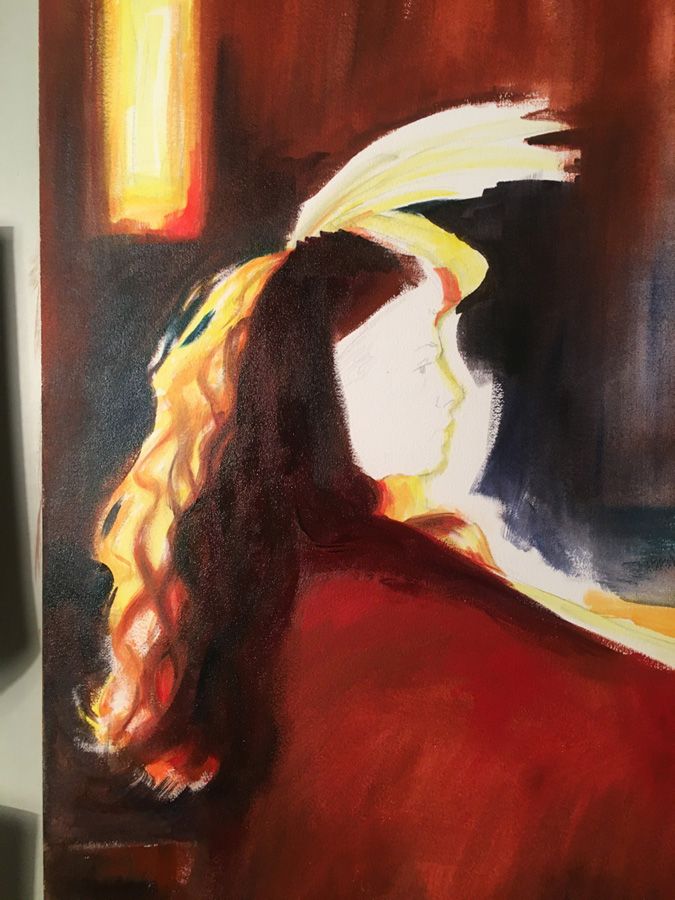
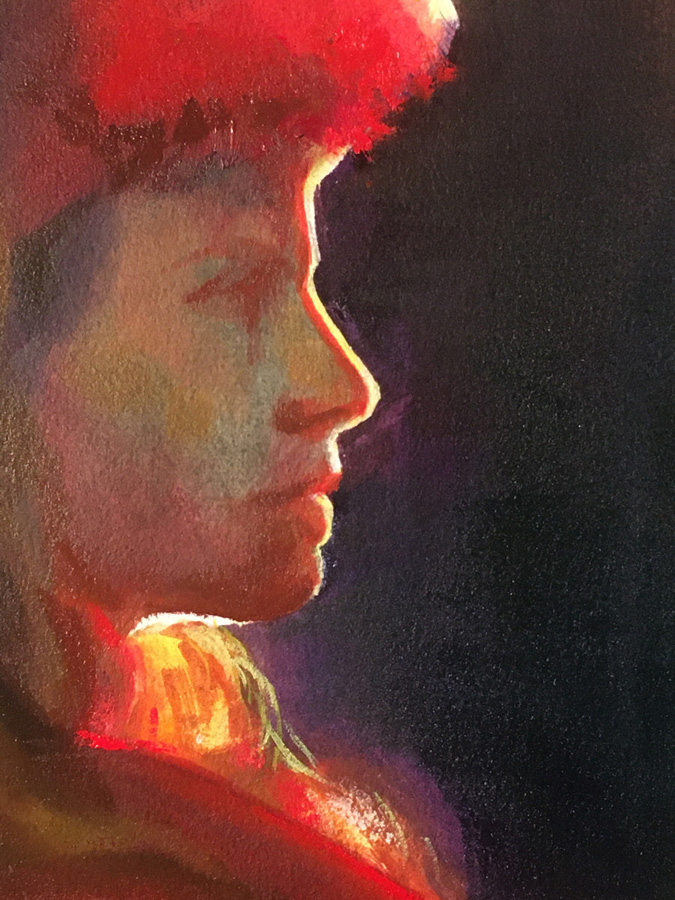
Since I wanted the figures backlit, I started with thin washes of oil paint, treating the medium like watercolor. So all the directly “lit” areas got the “yellow treatment”.
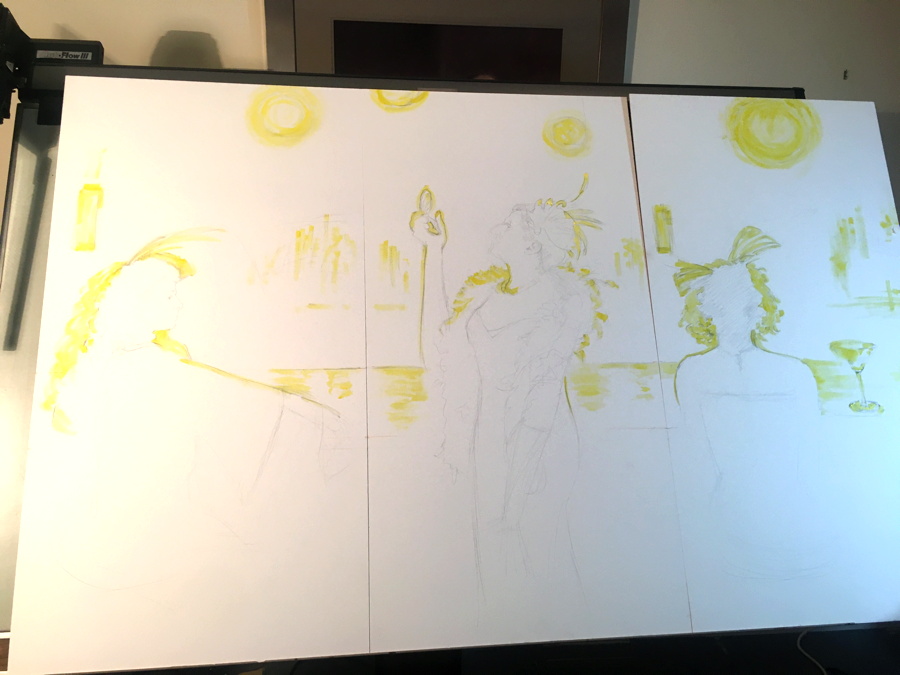
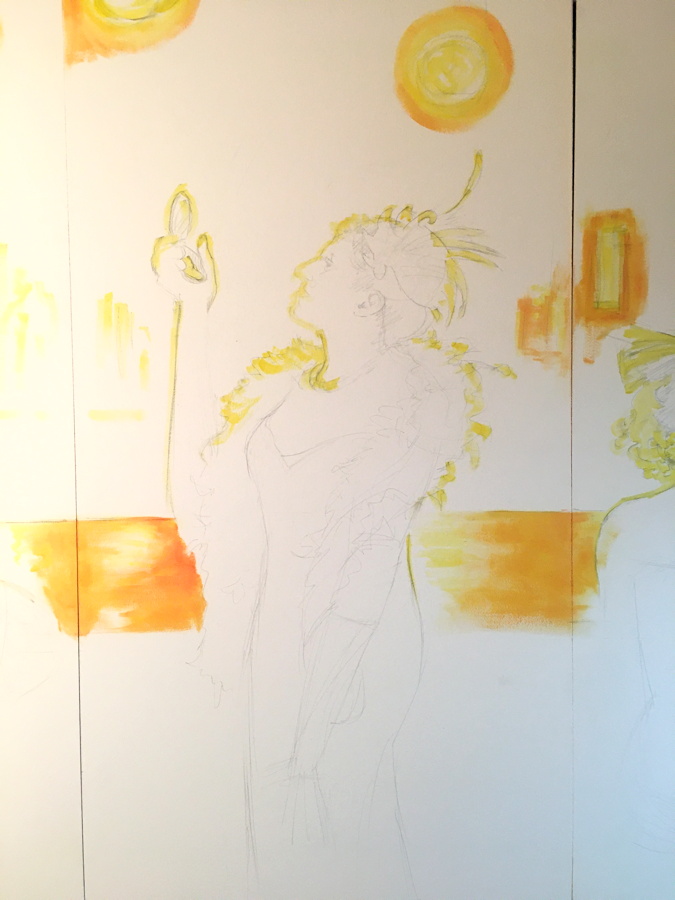
Then I kept adding oranges and then red to the lit areas, surrounding them to create a glowing effect. Although this may seem counter-intuitive when working in oils, (typically you save the “lights” for last and dash them on thick) I wanted to work backwards and use the white panels as my base or “primer” layer to get the oil glazes to create a jewel-like enameled feel. Plus I don’t like following rules.
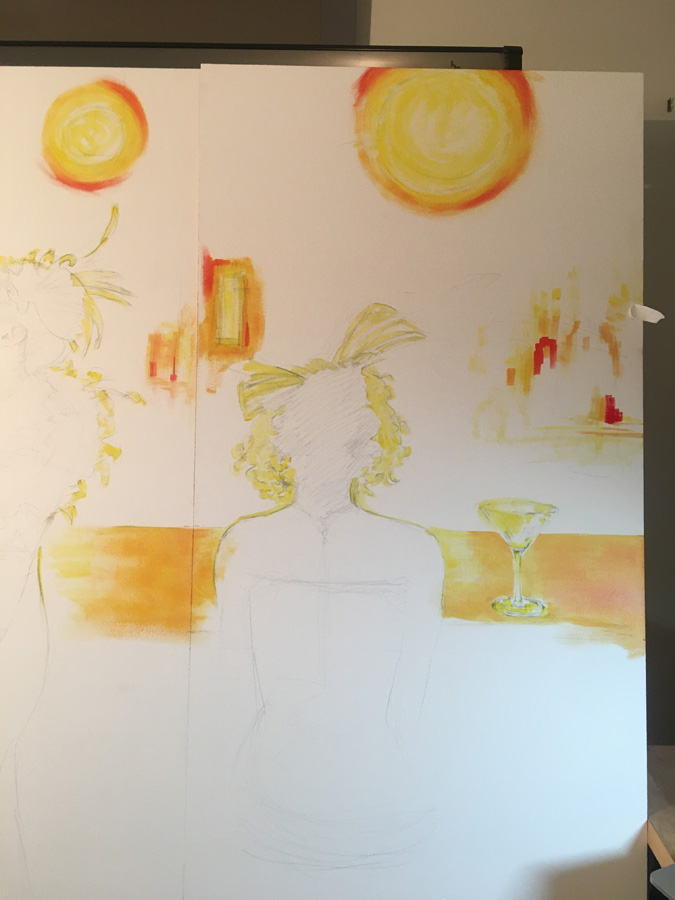
Then I began blocking out the figures in earnest. The photo below is from only the second day of actually painting on the panels. I was zooming along!
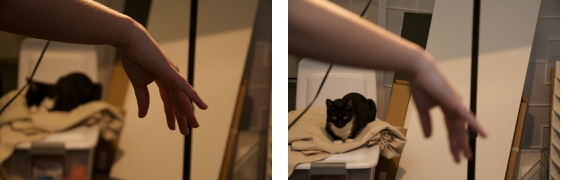
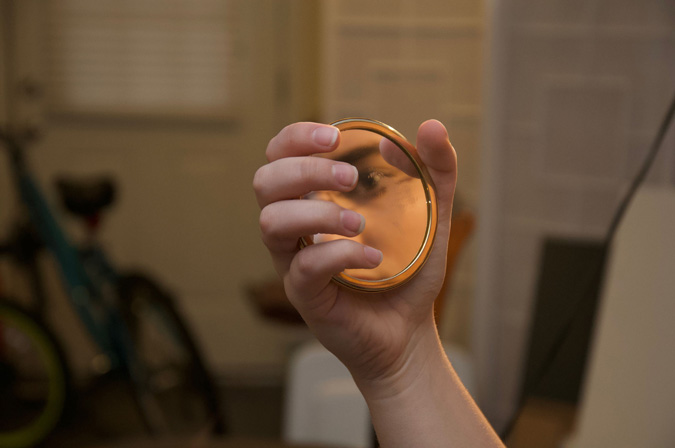
Along the way there were things that kept cropping up relating to my references. When I looked online for “flapper girl” references I found so many girls smoking! Naughty, naughty! That wasn’t going to work so I made the middle flapper checking herself out in a mirror. I took more photos of my oldest daughter posing with a compact in her hand as well as putting her hand over the back of a chair for the first panel. As I was taking these references, my cat, Havoc, can be seen in the background stealing the show.
Eventually all the opaque areas got “blocked”out and what originally looked like heavy, yellow and orange passages now started to reverberate agains the thicker, “blocked” areas. All the skintones stared out as green because I wanted to layer warmer tones overtop. People ask me all the time about the “right color” for skintones. Here is a secret… There is no right color! It is a constant back and forth of intermixing and trial and error sometimes. Green underneath does help though…
Above you can see the texture of the boards. It is a rather nice pebbly surface and it felt like coming home to me since I love working on paper for my pastels and for watercolor paintings in the past.
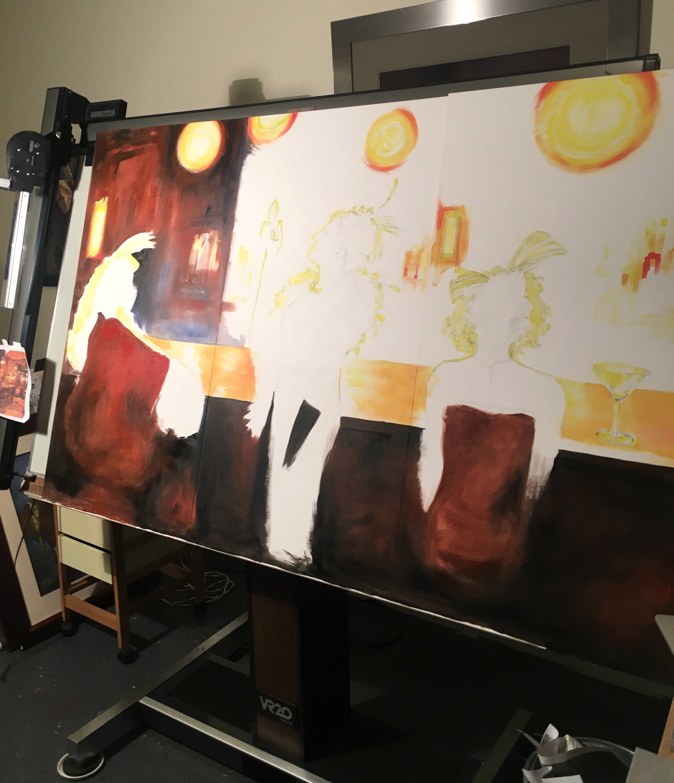
Then there was a big push to the finish… more on that next week!
Amazing how you handled the Scale of these panels! Thank Goodness for your drafting table. The Framing is coming along smoothly… because of the float mount, we will mount the panels approx. 1/4″ back within the floater frame, to help protect the panels from accidental damage.
can’t wait to see them! 🙂
Informative rundown. I love drawing with paint. BTW, an artist friend in Boston area, Mark Hayden (Copley master),does a cool thing when working on large works: At times, during the work, he’ll place the table with his large palette on it between himself and the painting. This forces him to be back away from the piece, and not too close. He also added “extenders” to some brushes. I’m sure you are aware of the dilemma of being close to a big piece and the difficulty in seeing what you are working on at the moment in the overall context of the composition. You can step back, of course. Dan Greene has that large mirror set up behind him. I’ll use the hand mirror over the shoulder. But Mark’s tip can be helpful in that you are already backed off of it and you can keep the flow going. I find it helpful.
great advice. thanks!!!
Thanks for sharing your process Christine! Can’t wait to try the new restaurant and see them !
🙂