Lets get technical and talk about pastel surfaces.
So I probably haven’t used every surface for the medium of pastel out there, but I can give you a pretty comprehensive analysis of the ones I use regularly. So let’s start with one of my favorite surfaces…Ampersand.
The cool thing about this pastel board is that it is a thick board and the surface is painted on masonite. It is not as heavy a “grit” as some others and it can also be used for oil painting which I have done. All of my Kintsugi oil paintings were done on Ampersand. The surface is relatively smooth and if you run your hand over it, it feels a bit slick. You would think this would make it great for smooth and “blendy” applications. And it can, but the best part about this surface is the deliberate texture you can get from a single stroke. Of course, different pastels act differently according to power and how they get along with other brands, (those that have taken my “Power” workshop know this to be true) but this surface will leave a more “broken” trail…and that can be very beautiful.
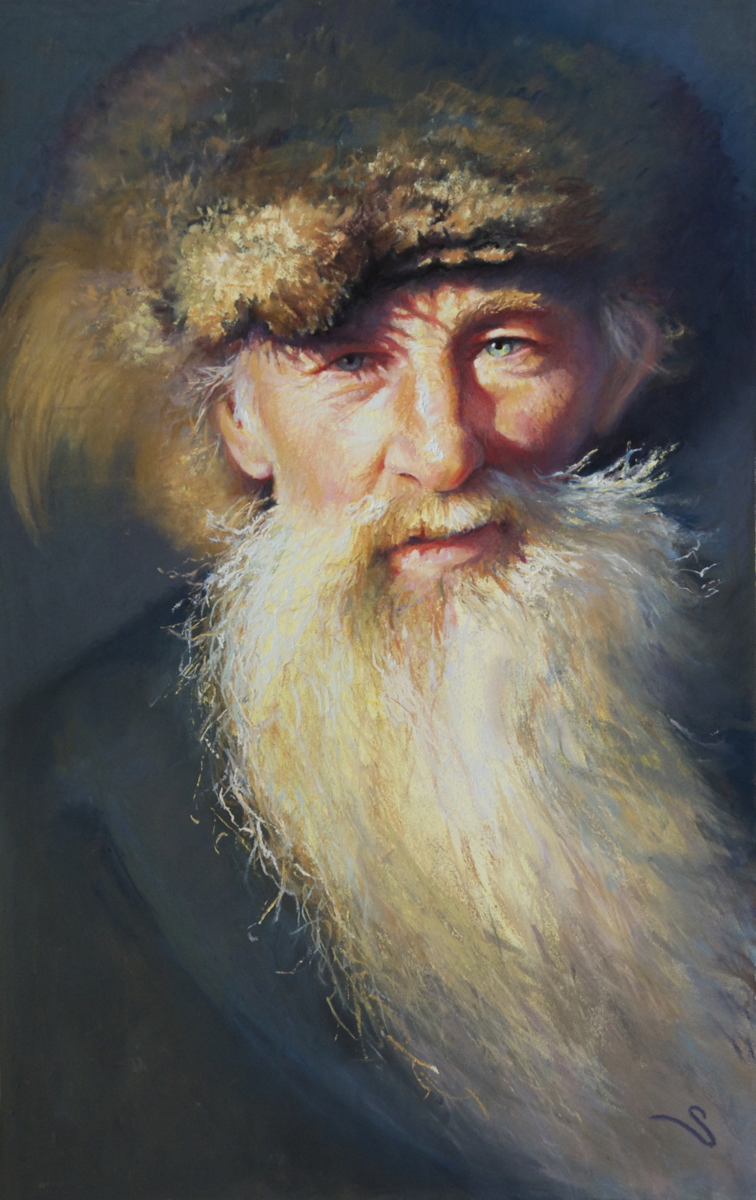
My painting “Indigent” below was done on white Ampersand. (pastel, 21 x 13″) And I deliberately picked this surface because of how the pastels leave such a clear “drag” across it.

Here is a close-up of the nose….cool textures huh? Skintones do NOT have to be “smooth” to work successfully. The cheeks are all pencilwork only. Crosshatching and nuances. Put marks in. Leave them alone. A “blendy” handling of his skin would not have let the skintones be “alive” in the sun. I frequently tell my students to not “give their painting the finger” and over blend with their hands because it really can kill the freshness of the pigments.

Ampersand takes thick applications of pastel- like on the nose- and also enables one to “push” the pigments around and easily “recede” areas too- like the ear. Compare the ear to the textures and marks on the nose. See the difference? This has to happen in order to create depth in the face- even in such a “shallow” space. The nose comes forward. This is necessary to “break” the flatness of the picture plane (the flat, Ampersand board) and create the illusion of depth and space. I softened the ear to make the nose more sharp. Make sense? Everything in painting is relative. (life too!)
I literally LOVED running that mint-green, heavy, Sennelier pastel down the highlight on the bridge of the nose… and then leaving it. The MARK itself has to be clear and clean and interesting… and “unfussed with.” I feel Ampersand is the best for that effect.
The boards come in a midtone grey-ish color and a few other hues, but white works the best for me. The colors stay clean on the surface- think of it like working in watercolor paint on white paper and getting the translucent colors to pop. That is what happens here. The best thing is that the board can easily be popped into a frame and the painting is good to go. Don’t worry about putting a mat around the image with this surface. The masonite board underneath is about 1/4 inch thick which makes it nice and durable and stiff to slam in my easel, but putting a mat on it will be awkward unless you want to pay a high-end framer too much to do it for you. Just make sure the frame is at least 3-5 inches thick. This is where pastel artists try to cheap out on the framing. It doesn’t look very good to put a cheap, thin frame on your work. Trust me. Put a thick frame on it and make your work look as important as it is….
Here is a link to the Ampersand site for more info. They also make other surfaces. If you haven’t tried it before, check it out and let me know what you are doing on it!
https://ampersandart.com
Next week, my love affair with Sennelier LaCarte.

My students and I make a “primer” from gesso tinted with acrylics and add extra fine pumice powder to create texture. We apply this to a board, (have used masonite), with a mini foam roller. Nice thing is that the amount of texture and color can be adjusted. It also works well for creating large pieces.
So proud of you Christine!
Hey David! That first set of Grumbachers you gave me when I was 16 has led me on a crazy path. Yes you got me using Rotten Stone for a few paintings. I still like to make surfaces too, but just don’t devote time to it anymore. I have added extra pumice in primer to Ampersand to give it a deliberate texture or swirls or whatever. Its good stuff. Thanks for chiming in! 😊
Hi Christine. Ambersand is made in Buda, TX. A hop skip and jump from Georgetown. It is a divine surface; like no other. I do like that it’s a panel which is so helpful for plein air.
Where I will be! Absolutely, its great! And I will be in Texas for workshops in October and November.
Thanks for doing this series on surfaces–there are SO MANY to choose from in the pastel world, and it’s great to hear what others have experienced using them. Looking forward to what you have to share!
Sure! it really does affect the outcome so I think about it a lot before starting anything.
I enjoy all of your blog postings. I’ve learned much from you. This is the first time I haven’t been able to grasp your exhuberance over ampersand panels. But thank heaven’s we are not all alike. I too have experimented with many different surfaces and just cannot warm up to ampersand. However seeing what you can do with it may just be the push I need to give it another go. My own fav is LaCarte for soft pastel, or perhaps Uart 500 (mounted on board). Or a number of other substrates. LOL. (It depends on what my intended outcome is. ) Can’t wait for next week.
lol. thanks Donna. I didn’t like it at first until I embraced how wild it can be. Yes love LaCarte for different reasons. More on that next week.
Christine, I’m new to your Blog and throughly enjoy it. Your enthusiasm motivates me to get cracking and get to work. I’m so grateful for the wealth of information you share.
I wonder if there is a place to get a recipe for David’s primed gesso? I’d love to experiment with making some surfaces.
Thanks, Nan
Hi and welcome! I am sure he would share. That gives me an idea for a blog post of making surfaces too. I have some recipes as well and I will check in with him. Stay tuned! 😊
I don’t have an exact recipe for the pumice primer that we use in my drawing class at BC3. These are college students and like to experiment with the amount of texture etc. Some students use a “universal” primer from a big box store as it is better for hard to grip surfaces and contains a stain killer. Extra fine pumice can be purchased online and we purchase it in bags.
Begin by tinting the primer to the desired color with either acrylics or a FLAT latex paint. Remember, it will dry about one shade darker. Add pumice and stir until it is about like yogurt. Apply two light coats in a random pattern rather than one heavy coat.
thanks!
I am going to try ampersand, but have tried Pastelmat and cannot get it to work for me. How about doing a blog on Uart?
yep! Im going to hit most of them…..
great
Have only tried Ampersand once, but I loved the result. So will try again. My fave is LaCarte, can’t wait to hear your take on it!
😊
I would like you to talk more about your power presentation!
I have the recording available of a live Power class on this site. OR just let me know you want it and I will send you the link and payment request.
Greetings! Very helpful advice in this particular article! It is the little changes that will make the largest changes. Many thanks for sharing!