Once the client is satisfied with the overall design and I know what their goals are in the commission, it is time to get to work.
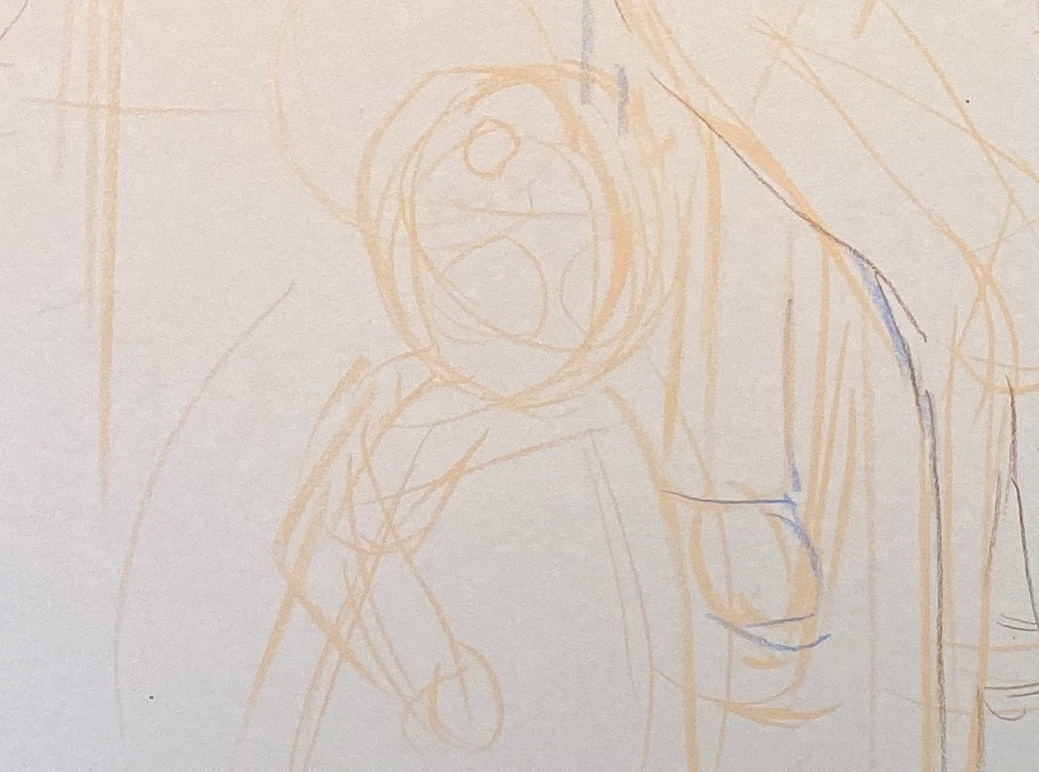
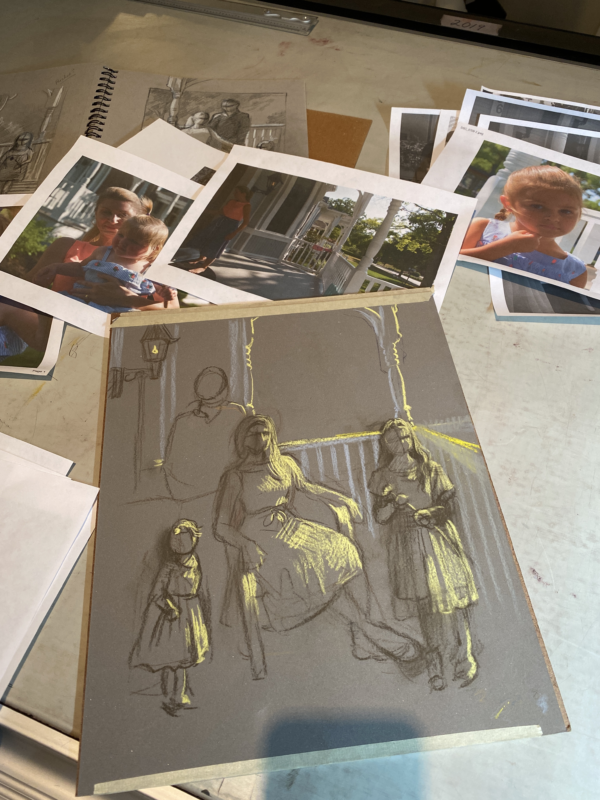
Typically with my commissions there are lots of photos being incorporated into one image. I normally call them my “bakers dozen”. Copying one photo is not my style. The painting needs to breathe and be its own entity. So the initial drawing needs to breathe and be flexible too.
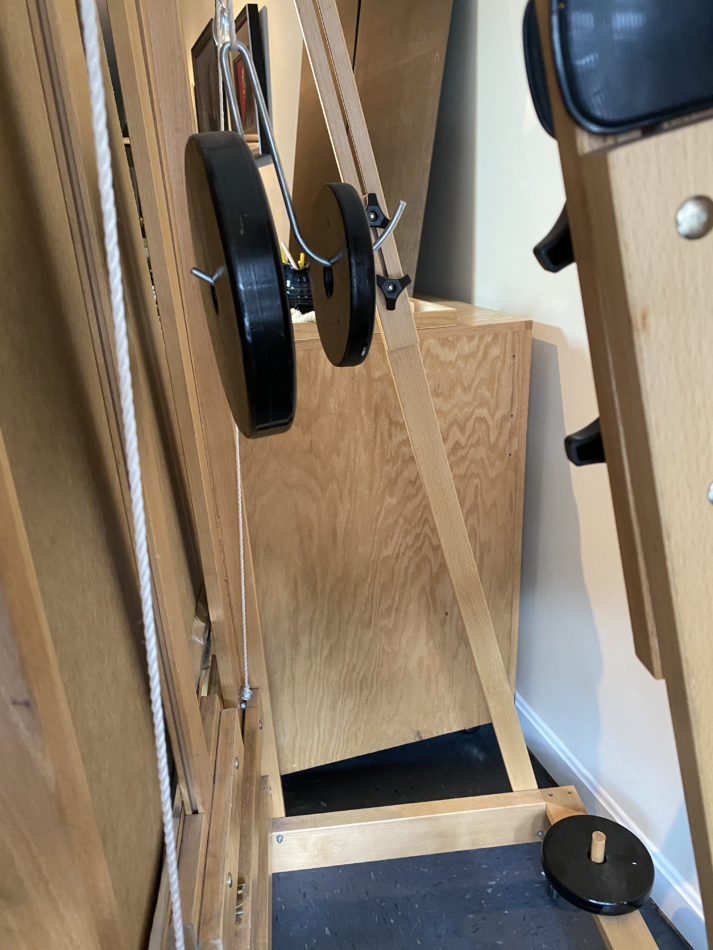
With my trusty Sorg Easel ready to go I can start the drawing. This panel as I mentioned last week is a 1/2″ MDF panel cut to size with UArt mounted onto the surface. This makes the panel rather heavy. I think it is about 30 pounds. So it is a beast to lift.
I have had my Sorg Easel for many years now and I love it. It is my friend and since we spent a lot of time together on this project (about 6- 8 hours each day at the easel) I need a friend I can trust. The best part is that it is a counterbalanced easel so the panel can float up and down as I am working on it. Great for a size like this of 42′ tall. I can shove the painting up to the ceiling (luckily my ceiling is 9 foot tall) and work on their feet and then quickly move the panel back down to work on the top of the painting – all at my eye sight line. No hunching. Owchie… I am too old for that.
There are 3 different weights that come with the easel so the weight of the panel can be changed. I found the right weight combination at the the back of the easel to “counter balance” the weight of the painting. Then it floats up and down. So nice. If you are looking for an easel, I highly suggest the Sorg. David Sorg will happily help you out and will probably answer the phone if you call. This design is his baby so tell him I said hi …
http://www.studioeasel.com/about.html
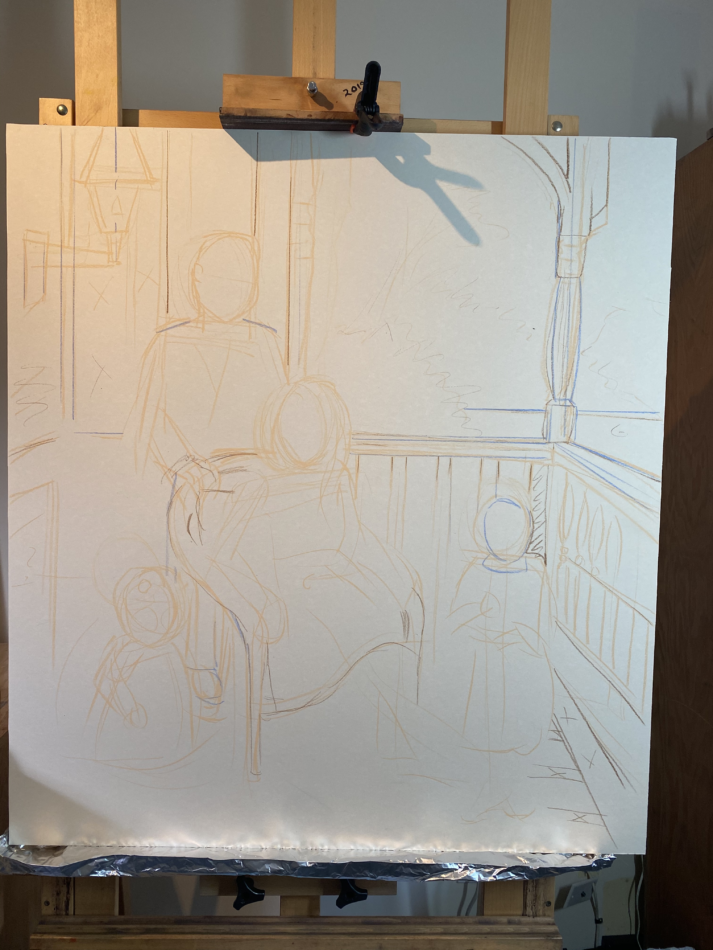
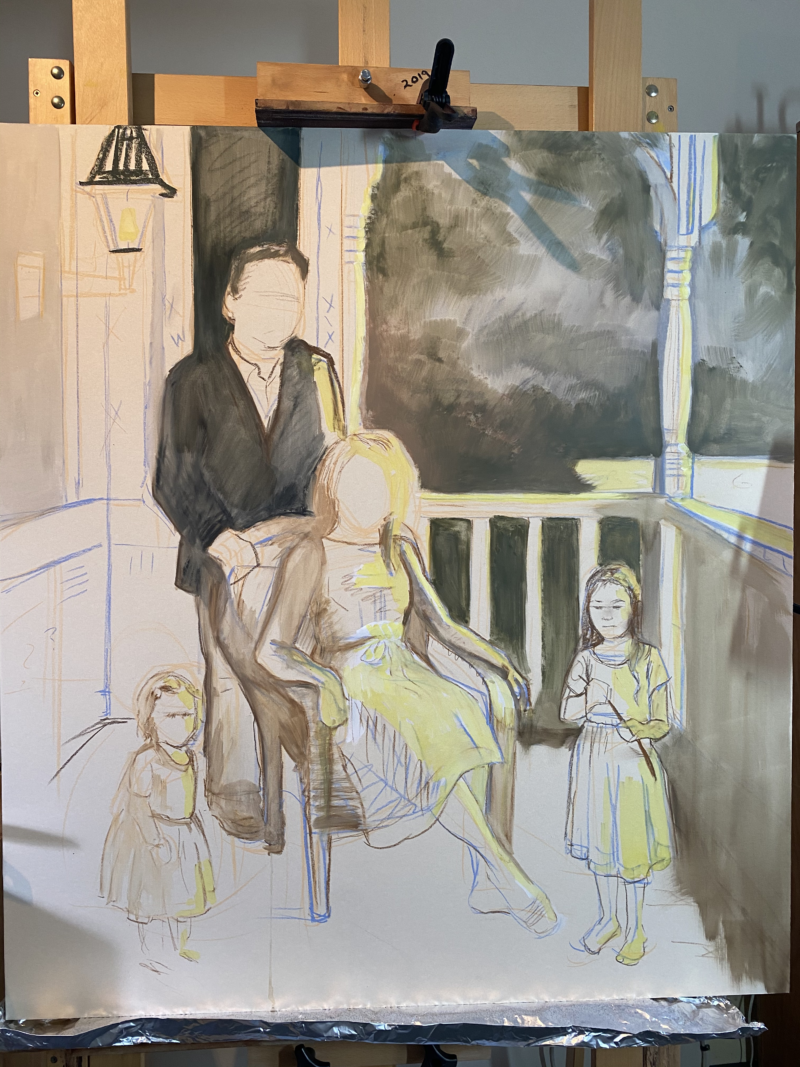
Then some basic blocking… what is lit? What is not? (Sound familiar to those of you who have taken my workshops?)
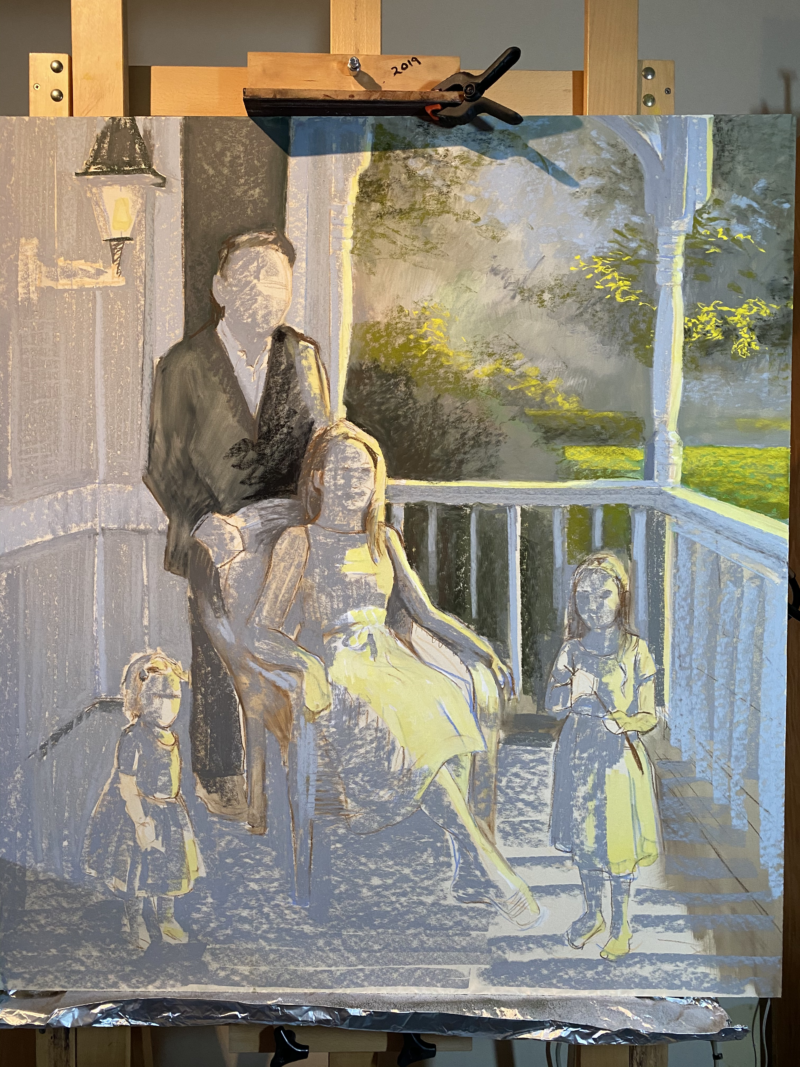
I then work only on the background greenery before continuing on with the figures. I do this for three reasons. First, to eliminate as much “dust transfer” as possible to the cleaner, more complete figures. Once the background is nearly complete I spray it off with fixative so that area does not bleed into and contaminate the figures.
Secondly, the background greens will be a big part of the painting with regards to color. There is no way doing it last will help me. I need to “register” the figures off of this area. If not, I may paint them too light or too pink, etc… I need that green to tell me what to do next with them! So as the background gets more completed I pop in bits of the color from the dresses to make sure I am on the right track. The colors need to talk to each other.
Lastly, putting in the far background gives me a “win” up front and gets the easiest stuff out of the way. This is the most complex and difficult painting I have ever constructed, so by having an area nearly finished and that I feel good about up front will let me know that the adjustments and pitfalls coming up my way shortly will be ok…..
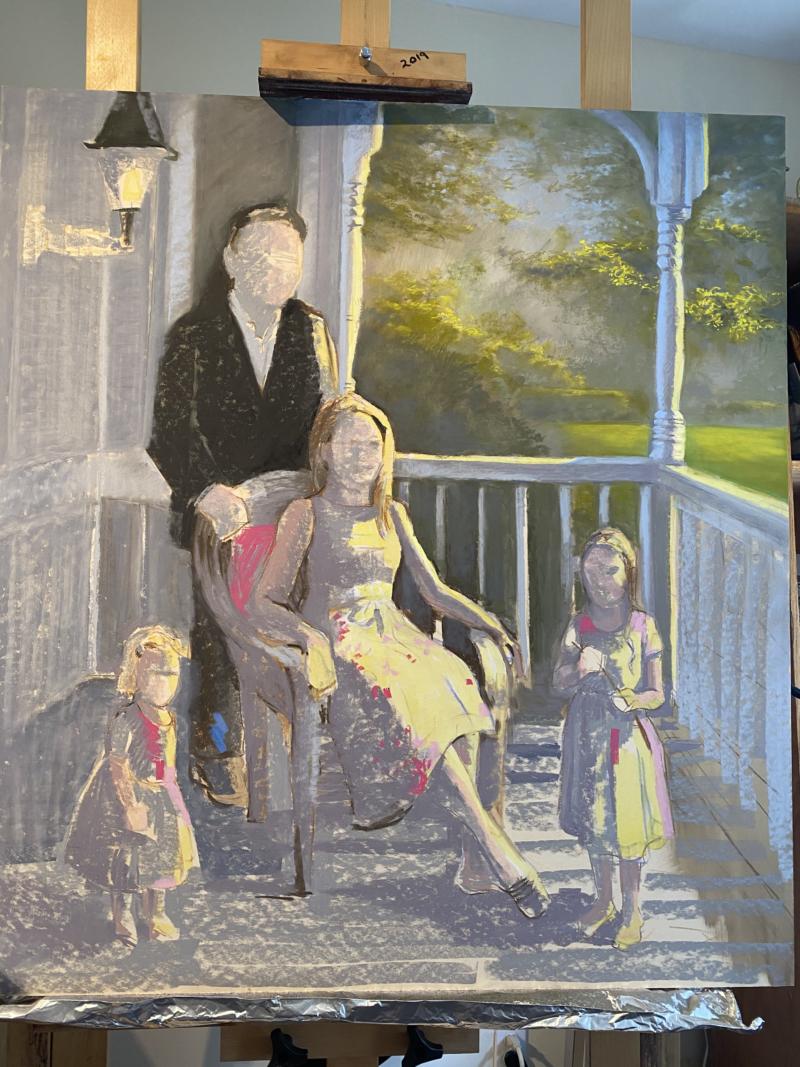
Once that feels pretty good I can start adding the railings and front porch… again, loosely… I have hope!!
More next week.
Hi Chris–I’ve been looking to get a Sorg for a while. Love the convenient working features! Question: Have you found that the “ease” of moving the height, up and down, remains easy during the time you have owned it? Does it tighten? Get harder to move, etc, as time has passed? Or, does it remain easy to do as when you first bought it? Thanks!
hi. It has gotten a bit “stickier” over time. I keep meaning to use the wax they gave me to rub down the moving parts. thanks for the reminder!
Already beautiful. So nice to learn your thought processes
thanks! 😁
Hi Christine,
I’d like to thank you for all your blogs. I’ve learned a lot from it. I did my last portrait painting pretty differently (planning on all the composition, color, etc.) due to your blogs! Especially things like these when you show your step by step process, it’s been very helpful! Thank you so much for your generosity!
I also wonder though… how do you frame your piece when it’s so huge like this? Are you still using glass for such a huge piece like this?
One other thing that I was curious about… in one of your blogs (the old one) you mentioned about you’re writing a book… has it come out yet? I have been searching for it but couldn’t find it, so I supposed it’s not out yet. I am definitely looking forward to it.
hi! glad I have helped. thanks for following along. Yes, this piece will have to still be under glass like all pastels. I always recommend museum glass so a piece this size will be about $500 just for the glass. I do not do framing and only charge for the art. I refer to the experts for the framing. I believe the frame that was picked out for this was a few thousand dollars. As for the book, it has gotten tabled a bit due to covid, my divorce, and a new series of paintings I am currently working on. I hope to still finish the book. I started doing videos and am working on those too….😁
Your tutorials are wonderful. I can’t wait to take a masterclass with you.
I am currently working on a painting that I realize I didn’t do enough to block the lighting. It is challenging because it is in too much of a “medium” range.decisions have to be made on where to create more depth and where to highlight.
yup . have to follow the law of light and the rules or you can get in deep trouble…..
Hi Christine,
I was submitting a comment yesterday, but didn’t find it… I wonder what did I do wrong? I would like to thank you for your wonderful blogs! I have learnt a lot. I found that I did my last portrait painting pretty differently due to all your blogs (I did a lot more planning and designing). It was fun! These blogs have been very helpful, especially the WIP like this! I am looking forward to see the finish piece of this commission.
I am also wondering, for such a huge piece like this… how do you frame it? Do you still use glass for such a huge piece like this?
Many thanks.
hi. thanks for following along and I am glad I have helped…many students have said they hear me whispering to them while they paint! hehe. The best thing about framing is that I dont do it and I dont worry about it. I only charge for the art and refer them to a framer. Yes, it will still be under glass since all pastels must be under glass. – museum glass in all cases if they can afford it. So the glass alone for this will be about $500 at least. Framing is a very personal taste and some like to spend a lot, some do not. So I leave it up to the experts.